How to setup Django with virtualenv in MacOSX Mavericks
In this tutorial, I’ll show you how to install the Django web framework on macOS with virtualenv. For those who don’t know what Django is, well Django is a web framework based on MVC architecture written in Python.
Note: macOS X Mavericks (10.9) is very outdated. This tutorial is kept for historical reference. For modern macOS versions, consider using python3 -m venv instead of virtualenv, or use pipenv or poetry for better dependency management.
Django is a high-level Python Web framework that encourages rapid development and clean, pragmatic design.
The Django website has very good documentation on the installation process. If you want to install system-wide, take a look at that. Anyway, let’s start our installation with virtualenv.
what you should know ,
1 just little terminal fu
2 thats all
steps
Open your Terminal (from Utilities or search in Spotlight):
pip3 install virtualenv
Note: For modern systems, use pip3 instead of sudo pip. It’s better to install virtualenv in user space or use python3 -m venv which is built into Python 3.3+.
okay now , virtualenv is installed lets create our project folder
mkdir my_project
now change directory
cd my_project
Now lets initialize virtualenv , it will copy python executable and setup tools etc to your project folder
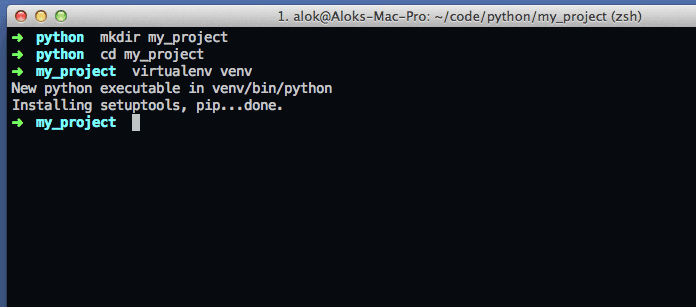
virtualenv venv
okay , Now lets activate virtualenv
. venv/bin/activate
Now finally lets install djnago
pip install django
after installation
python -c "import django; print(django.get_version())"
you will see installed django version .
something like ..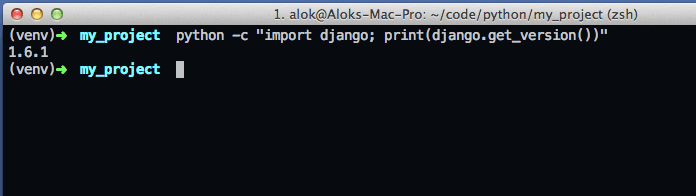
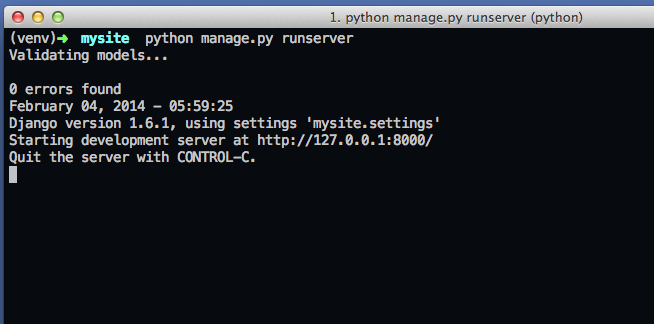
Okay, now Django is installed and ready to use. Let’s create a sample site:
django-admin startproject mysite
Note: In modern Django versions, use django-admin instead of django-admin.py.
now change directory to my site
cd mysite
python manage.py runserver
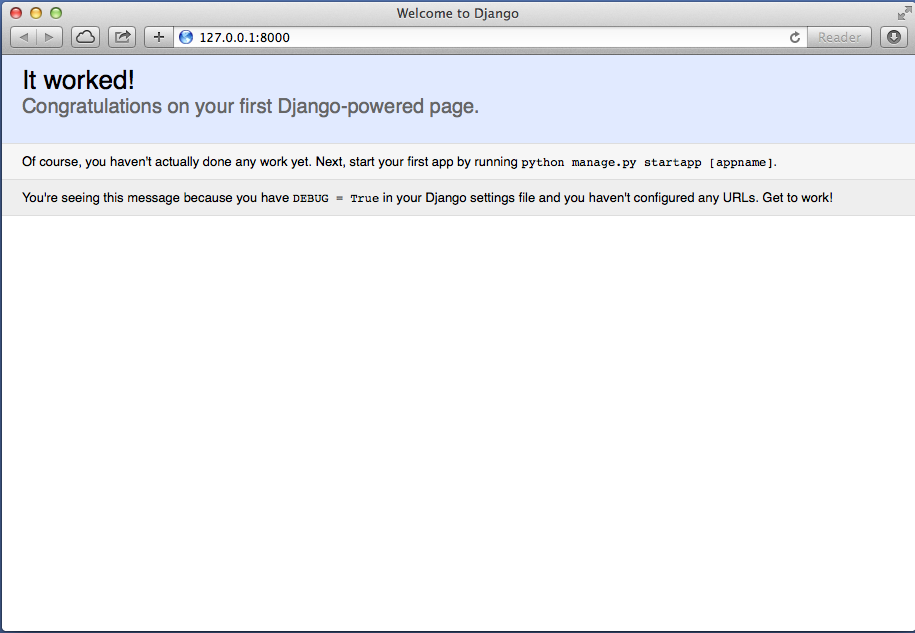
open browser and point to http://localhost:8000 , you will see default django welcome page
Leave your comments or start a discussion over forum.
I hope it was helpful for you. Thank you!